It’s that time of year when we review the best email marketing tools to work with. If you’re up for the challenge of upgrading your stack, go over this post and, most importantly, bookmark it. We update it yearly, keeping you updated with the latest releases. Ready to find what’s new in 2022?
Email marketers know that when the yearly calendar changes a digit, it’s time to recheck their email marketing tools stack. Change is always nearby.
And this year, it is no different. It seems like 2021 came and went in a flash, leaving new challenges and innovations in its wake. More people are now shopping and interacting with brands online, and as everyone has struggled to maintain connections with fellow humans, email has played a critical role.
What does this mean for email marketers?
In 2022, customer experience will reign, and engagement will be your watchword. From delivery to conversion, your success will hinge on building strong, lasting relationships.
Email marketers that don’t put their audience first will lose ground to those who connect with subscribers meaningfully. Making those connections at scale will require tools that collect and leverage individual pieces of data to build one-to-one communications that surprise and delight.
Maybe it sounds impossible. But personalizing your one-to-many messages at scale is no myth. You just need the right tools to manage that data.
In ancient myths, such as the Greek tale of Perseus’s quest to destroy Medusa, heroes were granted amazing tools to do what seemed like impossible tasks. They would assemble a collection of weapons, shields, and other enchanted items in their knapsack and carry them on their journey.
Some of those tools became legendary, and those in need of great help sought them time and again. Others were lost or faded into obscurity after serving their purpose.
You aren’t facing monsters with snakes for hair or malevolent giants on your quest to gain subscribers and win conversions. Nonetheless, your journey isn’t without its challenges, and every task requires the right tools to succeed.
So let’s take a closer look at your digital hero’s knapsack below, and search for treasures and eureka moments.
Some of the tools below are well known and are still leaders in their categories to this day. And some are rising stars.
We’ve predicted that 2022 will be the year that smart data use will be a leading differentiator.
Our 2022 email tech stack includes amazing, innovative data management and personalization tools that will enable you to launch legendary campaigns and bring your brand glory (and conversions).
Let the new year’s journey begin!

Select an email marketing platform to serve as your base of operations
Cave or castle. An empire above the clouds or an underground maze. Every hero (and villain) has somewhere they go to plan and prepare, inventory their assets, review their progress, and launch their operations.
Your email marketing program needs a base of operations, too—a digital home from which to launch your campaigns and monitor their progress. You need an email marketing platform.
Like a seer’s enchanted bowl, an email marketing platform enables you to view the big picture and zoom in on the details of your email marketing campaigns. With the tap of a finger, you can control what emails you send, when you send them, and to whom they are sent.
While powerful and essential, your email marketing platform is just one tool in your knapsack. It must integrate with your other tools, giving you total access and control of your campaigns at a granular level.
What’s the best tool for this critical role? Ongage.
Ongage harnesses your email marketing powers, giving you the ability to:
- Send email campaigns that land in inboxes.
- See all your campaigns and manage them through a single user interface.
- Empower collaboration and coordination across your team with leveled authorizations and built-in audit trails.
- Segment your audience and create unique campaigns tailored to each contact’s attributes.
- Develop event and behavioral-based campaigns incorporating dynamic content.
- Schedule, launch, and automate multiple synchronous and asynchronous campaigns.
- Sync data with your CRM, CDP, data warehouse, and other applications to create hyper-personalized content.
- Build and share powerful, actionable analyses and reports.
- Control cost and improve deliverability with a data-driven foundation for decision-making.
Ongage empowers you and your team to create and manage conversion-focused, customized, and compelling email campaigns at scale.
Combine email sending tools for optimal performance
In between creating your email marketing campaigns and monitoring their performance is the act of sending your messages.
A lot is going on in the background after hitting the “send” button. Many acronyms like MUA, MSA, MTA, and SMTP are involved in the process. We’ll spare you the technical spiel.
The fact of the matter is when you opt for an ESP solution like Ongage, the act of sending emails becomes less of a concern because the platform handles all these gritty/nitty details for you.
But suppose you want to become more granular and have more control over your email operation. In that case, you might want to explore a different setup—one which uses an on-premise MTA or a cloud-based SMTP relay to deliver your emails to inboxes.
There are many great options to choose from. If you’re in the market for an MTA, we highly recommend PowerMTA. In the cloud-based options, you can find giants like Amazon SES, SparkPost, SocketLabs, Pathwire, and more.
Remember, when you go the route of sending emails via an MTA or SMTP, you’ll need some tech know-how and a team to help you develop essential features to make the most out of your email channel.
Luckily, there are ways to eat your cake and have it too. Ongage seamlessly integrates with various MTAs and SMTPs. This means you can enjoy the deliverability benefits of SMTP relays, all while managing your email operation via a nextgen dashboard. You can learn more about SMTP relays and the Ongage integration on our blog.
Tools for building permission-based, engaged subscriber lists
For your email marketing program to succeed, the thing you need most is an audience–an engaged audience. Without a receptive audience, your email messages are a digital version of shouting into the void. Plus, if your list of subscribers doesn’t respond to your messages favorably, their mailbox providers will notice and start sending your messages to spam.
Save yourself from wasting resources and efforts by building a subscriber list filled with people who genuinely want to hear from you. In other words, get their active consent before placing them on your list and consider using double opt-in for total commitment.
Additionally, many jurisdictions prohibit using email and mobile phone data collected from consumers without their consent.
Learn about list-building compliance with these resources
- The CAN-SPAM Act is the United States’ primary anti-spam legislation. It offers marketers more flexibility than similar laws in Europe and Canada.
- The Telephone Consumer Protection Act (TCPA) is a separate set of US laws governing consumer-related telecommunications.
- Canada’s Anti-Spam Legislation (CASL) covers any commercial message sent to an electronic address and applies to both email and SMS communications.
- The EU’s General Data Protection Regulation (GDPR) governs the use and retention of consumer data, and its reach is broad.
Respecting your customers’ privacy preferences and reducing spam in their inboxes by gaining their consent will enhance your company’s sender reputation and keep you out of legal trouble. Find practical tips for building compliant email lists here and SMS lists here.
Okay, now that you know how to build your lists the right way, let’s look at the tools you can use to do it.
Build your email subscription list in 2022 innovative, interactive tools
You probably already have a few ways to collect emails, such as sign-up forms on your blog, invitations on your social media page, or opt-in forms at checkout. But is there more you could do to reach and engage with people who are a perfect match for your brand?
In 2022, gaining consumers’ attention will require some action to supplement traditional static forms and pop-ups.
Here are the best tools for the job:
Back in the toolkit for a second year and at the top of our list, no-code pop-up builder Poptin lets you create colorful, interactive, and on-brand pop-ups that invite your website visitors to share their email and engage with your brand. Use this tool to create sign-up, social share, video, and survey pop-ups, along with static header and footer bars to maximize sign-ups.

SignUpAnywhere takes you where your customers are to collect data, online or offline, using tablets and similar devices. Install SignUpAnywhere’s customizable templates on your devices, embed them on your website, and include a link to the form on your social media profile.
Best of all, you can use a custom QR code to send users your way.

When it comes to opt-in options, Optinmonster is a beast. Entice new subscribers with pop-ups, floating bars, scrolling boxes, gamified wheels, and exit pop-ups designed using one of Optinmonsters’ 100+ templates and 26+ MonsterEffectsTM. A/B test your designs and review your conversion results through the tool as well.
Referral tool GoViral is a great way to give and get. This tool leverages the power of social media and social proof to grow your subscription list. Select an opt-in landing page from GoViral’s template library, choose your desired action, and make your offer to encourage participants to share your page. That’s all there is to it.
Chatbots are another powerful way to engage with your audience and put your customers in control of the conversation. Build and customize a webpage chatbot using tools such as ChatBot or Formito to capture subscribers who prefer a conversational approach.

We introduced you to Chatfuel’s no-code bot builder that lets you add chat to your Instagram or Facebook Messenger pages last year too. This Metaverse chatbot maker’s intelligent system automates multiple intake channels and notifies you when the conversation needs to go live with a service representative.
Building your list is an ongoing process, so continue to test new ways to attract your ideal audience.
Keep your subscriber list accurate and active with these list hygiene tools
The tale of Odysseus and his quest to return home following the Trojan War is rife with betrayal and deception. Many times, characters, including the hero himself, pretend to be someone they aren’t to gain an advantage or make an escape.
Email subscribers sometimes engage in deceit for these same reasons. They may enter a fake email so they can get the reward you’ve offered for their data without joining your subscription list.
Your email list can become cluttered with invalid or low-value emails in other ways, too. Invalid or inaccurate addresses waste your resources and may cause bounces or other negative feedback that affects your sender reputation.
In the worst instances, an old email that was once valid can be recycled and become a spam trap. These emails are like the island of Circe. All seems well until the trap is sprung and your domain ends up on a blocklist!
These situations are why keeping your subscription list clean, and up-to-date is crucial to your email marketing program’s success.

Trust but verify (your subscribers’ email addresses)
Protect your email lists from inaccurate or false emails by using a tool to verify new sign-ups before adding them to your subscription list.
Coming in 2022, you can perform this task using Ongage. Ongage’s built-in email validation service integrates the validation process into your segments and list, ensuring that you’re sending emails that won’t bounce to people who want to engage with you. To be one of the first to experience this new Ongage feature, contact us and get on the waiting list.
Until the launch, these tools can help you keep your email list free of invalid addresses and troublesome traps:
New to the list this year, Emailable’s suite of tools offers a daily-automated bulk list verification. The service will detect disposable emails, duplicates, and misspelled domains. The tool will even give you an email quality score for the emails on your list.
TowerData and FreshAddress were both on our 2021 list. With the recent merger between the two companies, you can expect an exhaustive database of email addresses to up your verification game.
Both companies currently offer real-time verification of emails submitted on your website or mobile application using an API interface. You can also upload your entire list of emails for bulk verification.
In addition to assuring the validity of the email address, the system detects emails associated with spam complainers and disposable or temporary email accounts. The tool’s autocorrect and real-time error notifications help prevent the loss of genuine subscribers.
Honor unsubscribe requests with the help of these tools
List validation and verification services empower you to remove problematic emails from your subscription lists. The following two tools from our 2021 toolkit are still our favorites for managing unsubscribes and keeping your suppression list up-to-date.
Suppression list management solution Optizmo collects, stores, processes, and distributes opt-outs to all of your suppression lists. Optizmo offers suppression management for both email and SMS lists. You can also dedupe your list using Optizmo’s COMPARE tool.
Another popular suppression management tool is Unsubcentral. Unsubcentral supports your compliance efforts by centrally storing your suppression and opt-out data and automatically syncing the information across platforms. A share and compare feature lets you check up on your email marketing partners to eliminate duplicate emails and confirm compliance.
Build an unmatched data set with powerful data management tools
The good old days. That’s how we tend to view the past sometimes. Life was simpler, and the heroes were larger than life–able to achieve exceptional outcomes through sheer force of will.
The reality? Epic heroes like Perseus and Odysseus didn’t have it easy. They had to pay attention to every detail to survive their quests. They listened to the advice of friends and mentors, studied their opponents, and observed their surroundings to uncover the secrets of each new challenge.
Email marketing was never simple either. Sending emails may have been easier with fewer regulations, rules, recipients, and competitors. But figuring out how to make those emails effective has always been challenging.
You have a significant advantage over yesterday’s email champions, who had to rely on guesswork to make critical decisions, though. You have innovative data management tools to guide you, and those tools become more advanced every year.
Consumers’ expectations for the right time-right message personalized experience will only increase in 2022.
According to McKinsey’s Q4 2021 report, 71% of consumers expect brands to deliver personalized interactions.
Consumers know you’re collecting data about them, and they want you to use it for their benefits by presenting content that responds to their preferences and needs. Show your subscribers that you’re listening.

Connect your data management and customer intelligence tools with your Ongage email marketing dashboard and create one-of-a-kind email campaigns that convert subscribers to customers and build lasting relationships.
CRMs, CDPs, and CIPs, oh my!
Last year, we featured three traditional customer relationship management (CRM) applications, Salesforce, Pipedrive, and Agile CRM, in our toolkit. CRMs are well-known and well-loved by marketing and sales teams because–when used correctly–they provide a single source of truth about each of your customers and their stage in the buyer’s journey.
But traditional CRMs are limited by their dependence on the humans who use them to input accurate and timely data and by the types of data most CRMs are designed to collect and retain.
Nonetheless, these data management workhorses can serve you well if you begin exploring audience segmentation and email personalization. You can also funnel data from other sources, including the tools I’ll tell you about next, into your CRM to enhance customization capabilities. Information from your CRM can then be fed into your Ongage email workflows using API codes or Zapier integrations.
Now, let me tell you about the new data management tools that have emerged over the past years. They’re pretty awesome.
Customer data platforms (CDPs) and customer intelligence platforms (CIP) are the next generation of customer data management. They expand the types and sources of data collected beyond that of CRMs and employ automation to make collecting that data more manageable and efficient.
These data management systems also include advanced segmentation and analytics tools to empower sales and marketing teams, helping them better understand individual customers and the customer lifecycle.
Here’s where it gets confusing. There’s a lot of overlap in performance and capabilities between these apps, and not everyone agrees on the definitions for each.
In general, a CRM system receives data from members of the sales or other teams. This information usually consists of basic contact information, each touchpoint or interaction record, and other data useful for lead scoring. Sometimes the CRM is the sole domain of the sales department. Ideally, customer service and marketing teams can access this data to improve the customer experience.
A CDP actively gathers information about customers across channels. These applications use API to pull data into the system, where it can be accessed by team members from every department within the organization. First-party data collection across channels is enabled by assigning a personal identifier to each customer (often an email or mobile phone number), which is then used to connect incoming data to the customer data set. This input is consolidated to create a single, personalized view of each customer.
Both a CRM or a CDP may also record zero-party data– the information your customers provide to you through preference centers, surveys, or other direct responses. Segmentation capabilities are characteristic of CDPs. But most modern CRMs usually have some advanced functions like this as well.
For example, CRM giant Salesforce now offers Customer 360, allowing clients to choose from many applications and integrations to customize their data management and funnel optimization.
What happens when the data management program starts evaluating all this data and spitting out suggestions?
Then we call it a CIP. A CIP will take all the first and zero party data from the CRM or CDP and analyze it using artificial intelligence and machine learning. In addition to using these data systems to segment and personalize, they will tell you when to contact a customer and sometimes even what you should say!
The CIP category saw the most growth in 2021 as machine learning became more sophisticated. Many of these applications and related AI content assistants aim to serve sales teams. My recommendation is to start looking at these applications for your email marketing programs now, and you can talk to us at Ongage as well about our very own data capabilities.
Gathering data about your customers from their browsing and purchasing behaviors, stated preferences, and interactions with your emails and other marketing channels increase your organization’s knowledge and your ability to create personalized and pleasing experiences for your email subscribers.
With all that out of the way, let me introduce you to these cool data management tools.
Real-time data collection tool Tealium gathers all your customer data in a central hub and sends it anywhere. Collect information via API on the web and from mobile or IoT devices as well as from offline sources. The tool delivers individual customer profiles and predictive insights.
Lytics CDP and AI-powered decision engine uses real-time behavioral insights to provide marketing teams with ad spend, segmentation, and content personalization recommendations.
Funnelytics uses behavioral data differently. This funnel optimization tool converts your customers’ behavior data into journey maps identifying your customers’ pathways and the friction points slowing your revenue flow.
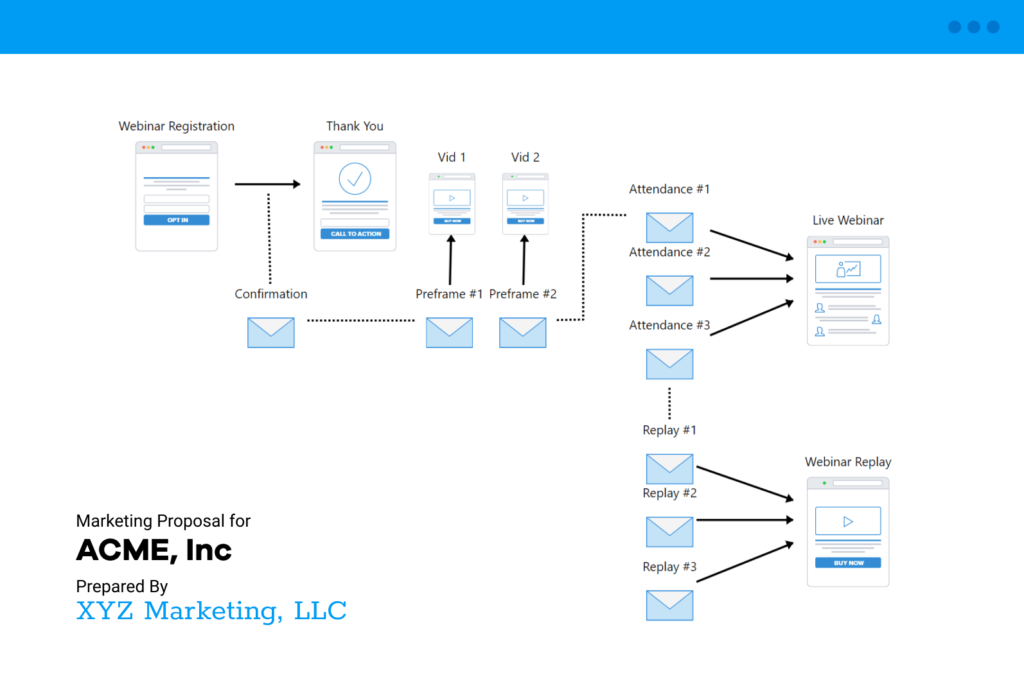
Sales-focused HeadsUp and Fortella use information about prospects and customers to identify the right time and targets to maximize conversions.
Correlated brings together data from your customer data platform (CDP), CRM and data warehouse and analyzes it all to produce actionable insights about your customers, enabling you to hyper-personalize your emails and maximize conversions.
Last, if you use several different data tools and want to break down those silos, a data warehouse like Hightouch can unite your teams.
This tool is a super data storage and transfer system. It integrates with your other data-dependent tools, syncing information and putting it where you need it when you need it. By distributing data between departments and storehouses, this tool keeps everyone on your team informed and automatically feeds your CRM with up-to-date customer information and business intelligence.
Keeping your current systems and employing integrations is often the best solution to managing your data across departments and teams. This strategy allows each group to leverage the tools that best help them achieve their objectives without data loss.
When you connect your data management and customer intelligence tools with your Ongage email marketing dashboard, you gain the ability to create one-of-a-kind email campaigns that convert subscribers to customers and build lasting relationships.
But wait, there’s more–more data to be had, that is.
Data enrichment tools to enhance your knowledge about your subscriber
In Greek mythology, both Perseus and Odysseus were able to diminish the power of and defeat their opponents–Perseus the three sea witches and Odysseus the cyclops–by taking away their sight.
Having a limited view of your subscribers diminishes your power to engage and convert as an email marketer. But building 360-degree subscriber or customer profiles through email marketing can be tricky. Sometimes all you have to start with is an email address. If the owner of that email doesn’t interact with you, how will you gain the knowledge you need to deliver a premium customer experience?
Data enrichment tools are the solution.
Data enrichment tools vary in the services they provide. Some match a single user with each of their email addresses. Others, including a few of the verification tools I mentioned previously in this article, can produce an email contact’s street address or social media accounts.
Still, other tools go beyond the basics. For example, one of the tools we first introduced last year, Webbula, can supplement your subscriber data with postal addresses, phone numbers, demographic information, and self-reported behavioral data. Data can be connected to an individual consumer through their email or IP address.
Also, making a second appearance, Cognism integrates with your CRM to update your data at every customer journey stage. This tool built for sales teams prevents data decay by filling in data gaps and automatically updating your CRM when a contact’s information, such as their address or job title, changes.
We also introduced you to Clearbit last year. This “marketing data platform” for B2B companies uses real-time intelligence to keep you in the know about your subscribers and customers. The app offers batch data updates, identifies anonymous website traffic, and helps you complete contact profiles when you only have an email to work from.
This tool from last year’s lineup gives you a whole new way to understand your subscribers. Are you ready for this? Crystal employs AI technology to analyze publicly available information about individuals to identify their personality type.
Okay, those are some fantastic tools. But check out the new 2022 contenders.
New tools to add to your data enrichment stack in 2022
Loqate is a postal address verification tool that uses type-ahead digital technology to make it easy for your customers to enter their addresses accurately. These features help you reduce friction and avoid misdirected deliveries. Loqate offers telephone and email validation and deduplication services, change of address processing, and data cleansing too.
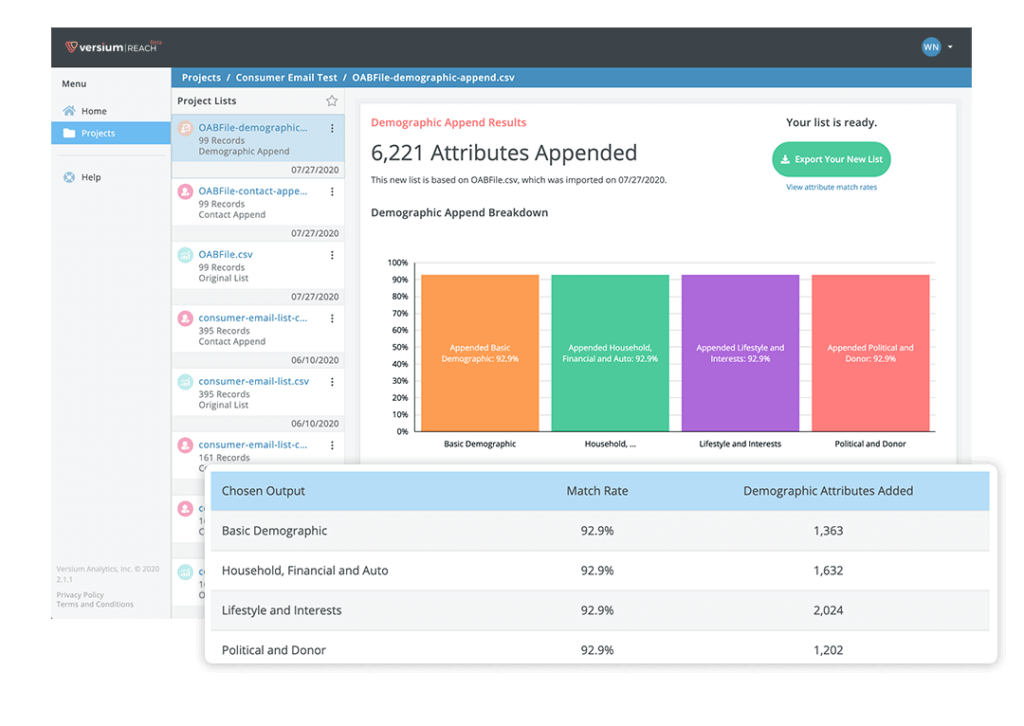
B2B and B2C data enrichment service Versium offer first-party data and contact point validation in part by tapping its proprietary data about 300+ US consumers. Its proprietary identity resolution technology cross-indexes contact points between channels and automatically updates your information. A data visualization feature helps email marketers see opportunities and insights.
Prospecting tool Leadfuze works with third-party data partners and crawls the internet itself to compile real-time information, which is then aggregated and double-checked by AI. This tool will identify the social media profiles, phone numbers, employer, and background associated with your email subscribers–and validate your list.
LiveRamp (f.k.a. Acxiom) is a data connectivity platform that does a whole lot of stuff, including data enhancement. The LiveRamp Data Marketplace enables users to access third-party data from top global providers. This data can be used to improve your subscriber knowledge and build hyper-targeted segments by combining first and third-party information.
Tremendous tools for creating epic content at scale
Pandora’s Box tells the tale of a mortal named Pandora who was imbued with many talents and gifts by the ancient gods of Greek mythology–amongst them, curiosity and a box she was forbidden to open! Of course, the combination of temptation and curiosity proved too powerful for Pandora.
She opened the box exposing the human world to trouble for the first time. Yet Zeus (who had given her the box to take revenge on Prometheus for giving humans fire) in his care for Pandora also included hope–making his gift both a curse and a blessing.
Email technology makes it possible for companies of any size to reach the masses. But, like the gifts the gods bestowed on Pandora, this ability can be both a blessing and a curse for email marketers.
Easy access to email recipients brings with it the temptation to contact them in ways that don’t serve their interests. Selfish and deceitful spammers overwhelm inboxes. Even legitimate email marketers sometimes go too far in their quest to win conversions, forgetting that their presence in subscribers’ inboxes is by invitation.
Amidst all the noise and chaos, it takes great content to win lasting attention and affection for your subscribers.
The following tools, including some of our favorites from 2021 and some new discoveries for 2022, will help you create email messages that resonate with your subscribers and stand out from the noise.
Drag and drop editors and templates produce more emails in less time
You and your email marketing team have a lot of work to do and limited time in which to do it. You don’t have time to create a new format and design for every email you send. But, you do need to make sure the emails you send are attractive, on-brand, and render correctly across devices. No-code editors and template builders are your secret weapon in your quest for speed and accuracy.
One of our favorite content and template assembly tools this year, and the last is BEE (which stands for best email editor). BEE Free and BEE Pro offer you multiple ways to design your email messages, collaborate with your team and preview the results.
Use the app to create customized email templates that meet your brand’s style and format criteria for a streamlined email creation process that keeps your campaigns moving. The BEE Free editor is built-in to Ongage, making template creation a breeze.

If you want more templates to choose from or are just looking for design ideas, check out Stripo. This design center offers more than 850 free HTML email templates plus more options under its premium plan. Tip: Sort the available templates by integrations to find those that work with your email marketing platform.

Create email newsletters and matching landing pages with Designmodo, a (relatively) new tool on the block. Its Postcards email builder lets you collaborate in-app using drag-and-drop and HTML editors. Then, send your team a prototype to preview or export the results to your favorite ESP.
💡Collaborative template tools empower your team members who weren’t gifted with creative skills to share their ideas with your design team.
Drag-and-drop editor Unlayer is a collaborative tool that you can use as a standalone design studio or embed in your application. Using Unlayer’s suite of tools, you can create mobile-responsive emails and landing pages. Tagging, user authorization controls, and guest commenting allow you to organize and review your emails across teams. Build your emails from scratch or start with one of Unlayer’s many email templates and template bundles.
A new entry in the collaborative email creation niche caught our eye this year. Chamaileon speeds up the design process by making collaboration a breeze.
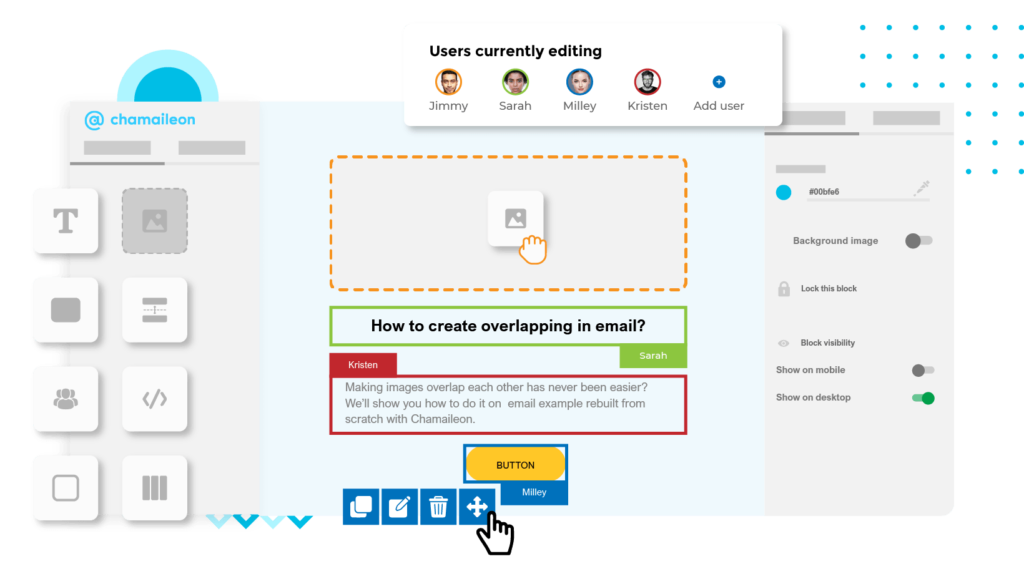
The email editor supports team collaboration in real-time and generates responsive emails ready for export to your ESP.
Insert interactive elements in your emails and raise the bar on engagement
Emails are essentially just digitally delivered collages of words and pictures. It doesn’t sound that exciting when you put it that way–and a lot of emails aren’t inspiring. That’s a problem.
Action, adventure, emotion, sizzle, and surprise–that’s what makes ancient myths so engaging. Adding action and emotion to your emails can make them engaging–and entice your subscribers to take action, too.
Some of the sign-up and subscription tools I shared with you in Phase 3 are useful for developing interactive games, surveys, and other elements to include in your emails too.
Here are a few more tools you can add to your kit.
Remember the gift of curiosity given to Pandora? We still got it. Humans love to ask and answer questions.
Stimulate that curiosity and interaction with your emails by adding a quiz using Interact’s quiz building tool. The app includes a selection of topical quizzes that you can customize to make your own, then add to your emails using Zapier integration.

Content customization app, Digioh gives you everything you need to create a variety of data-gathering and interactive elements, including pop-ups and preference centers, recommendation quizzes, and post-purchase surveys. The app also supports A/B and multivariate testing to identify the content that performs best.
What’s more enticing than interactive elements in your emails? Personalized, interactive elements.
Combine your subscriber data with dynamic content tools to make a personal appeal to every subscriber
Dynamic content options have increased in recent years as more email marketers recognize the value of communication with their subscribers instead of at them. Once upon a time, using a merge feature to add your subscribers’ names to an email subject line was considered cutting-edge personalization.
Now, high-performance email marketing teams use hyper-segmentation, hyper-personalization, and interactive elements to create one-of-a-kind emails that speak directly to the individual recipient and prompt them to respond.
Data such as when a subscriber last visited your website and what products they viewed can be used to tailor your message and send it at just the right time.
Dynamic content plus branch logic allows you to distribute different messages to each audience segment within a single email campaign.
Here are the tools you can use to create custom-tailored, memorable emails that connect with your subscribers and build lasting relationships:
NiftyImages was one of the tools that made last year’s list. This image editor lets you use individualized, real-time data to create one-of-a-kind email experiences. The free version of this tool enables you to insert data from any of your fields into a graphic or image. The features flexibility means you can add a name, unique discount code, birthdate, or other individualized copy to your email’s graphics. You can also add a countdown timer linked to each subscribers’ time zone or other relevant date and time.

Using NiftyImages paid features, you can create individualized charts and geo-targeted messages for your subscribers.
Could you say it better with a GIF? Vidu lets you create personalized GIFs. Use this tool to spotlight your product, your customer service team, or a cute kitten to win your subscribers’ attention.
Inserting customized countdown timers and personalized images–cool, cool, cool. But this is 2022. Time to bring on the video.
Video creation software Lumen5 brings marketing teams the power to create high-quality videos that can be quickly localized and customized for different audience segments. Why tell your subscribers about your latest products when you can show them?
Bannerbear brings dynamic customization to video, Gifs, graphics, PDFs, and more. Use this tool to use your own or stock content to create themed visuals for your marketing assets. Convert your URL to a QR code and insert it into any of your Bannerbear creations to capture more leads.

A top pick last year and again for 2022, LiveClicker is a content personalization multi-tool for enterprise brands. Create live promos, videos, and countdown timers for your email messages. LiveClicker’s real-time data integration and personalization tools impress your subscribers with content that only exists at that very moment.
Send real-time inventory updates, countdowns or screenshots, location-based offers, maps and package trackers, weather-dependent images, live video, social media updates, or breaking news alerts.
Leverage machine learning to enhance your copy and your customers’ experiences
Perhaps one of the most significant developments of 2021 was the rise of robots–the kind that writes copy. AI-assisted copywriting was all the rage, despite sparking some outrage from those who value the craft behind good copy. Are robots going to replace copywriters in 2022? Probably not, but they can help you quickly personalize your copy and brainstorm ideas when Calliope and none of the other creative muses respond to your pleas for inspiration.
Among the new digital contenders for copywriting supremacy are Copy.ai, Anyword, and Jarvis. While none of these AI applications promise to write emails for you, they will pull ideas from the internet that may help you identify pain points, develop new subject lines or get a glimpse into what the rest of the world is writing about.
Also making our tool list for 2022 are several AI copy tools designed to improve cold emails and individualized outreach.
AI writing assistant Flowrite makes email writing easier and faster by turning your notes into a complete message.
On the sales side of things, cold email opening line generators Smartwriter and Warmer.ai. These AI tools search for information about email recipients to enable sales teams and other cold emailers to personalize the first lines of their emails–giving them a warmer touch.
Finally, multi-channel sales engagement platform Reply.io integrates with your CRM, improves your email copy, performs bulk email validations, and even lets you test your subject lines.
But wait, if these tools are meant for one-to-one communications, why are they on my list of tools for bulk emailers?
Because you can begin using these tools when you need some quick inspiration or to help you create hyper-personalized messages for your VIP customers now. Plus, familiarizing yourself with the state of personalization in 2022 will prepare you for the type of personalization your customers may expect from you in the not-so-far-away future.
Gather inspiration from the crowd and fellow creators
Are you looking for more organic sources for inspiration? These tools will help.
AlsoAsked and AnswerthePublic aggregate public search queries and other information sources to discover what people using the internet want to know. Enter your product or service name–or some of its key benefits or features–and find out the related questions people have on their minds.
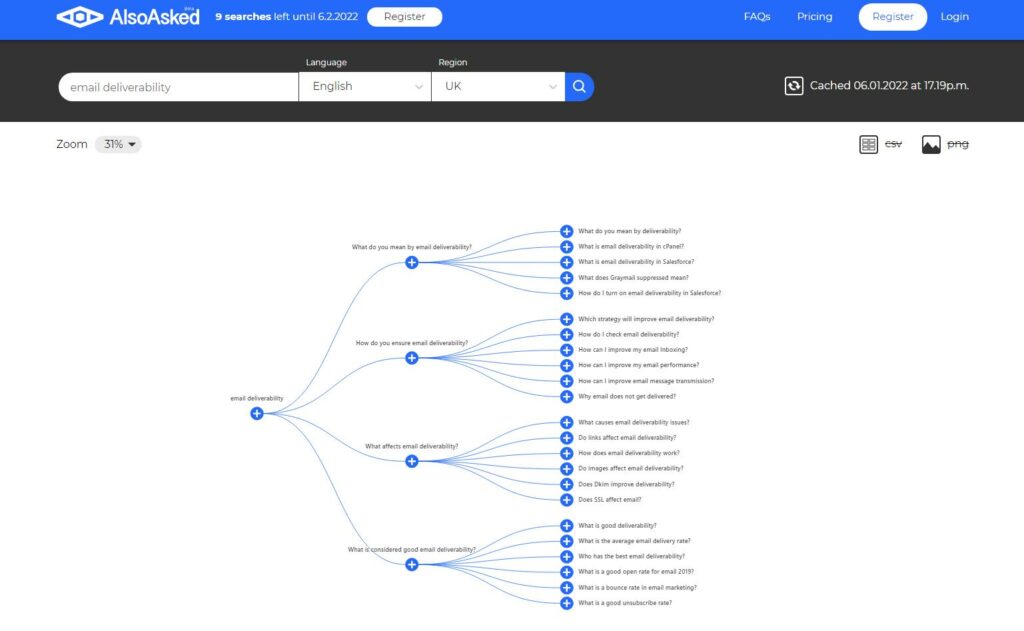
Earn more clicks and click-throughs by creating email subject lines and content that ask (and answer) these same questions.
After you find out what consumers want to know, check out these content curation sites to discover how other brands are answering:
Really Good Emails. The name of this site isn’t an exaggeration. We regularly tap RGE’s ample inventory of emails to locate examples of email best practices and creative ideas (thanks for that, guys!). Search by publisher, category, or keyword to get inspired.

You can also find inspiration from a tool we first introduced last year, Mailcharts. It’s like a filterable Wayback Machine for marketing emails. They’ve been collecting emails sent by thousands of different brands since 2013, curating a collection of email examples covering 50 various industries.
Want to find out what deals your competitors offer in their email newsletters? Milled is the place to go. Aimed at busy consumers who want to streamline their pre-shopping research, Milled lets you search for brands’ email newsletters on the site or subscribe to receive customized updates about your favorites.
Ensure an optimal subscriber experience every time with these email testing tools
When you send millions of emails every year, you can expect a few not to perform as expected. Sometimes your message doesn’t hit the mark. Other times, formatting or other deliverability errors are the reason for your failure to communicate.
In other words, even the best-laid plans can go awry. That’s why it’s essential to test your emails’ content and presentation–and make sure ISPs will allow them to reach your subscribers’ inboxes–before you send them.
Here are the tools that will help you do that.
Deliverability and spam scoring tools for detecting issues that might keep you out of the inbox
Before your email can accomplish its conversion objective, it has to make it to the inbox. Good list-building and hygiene practices are your first step toward this goal, but not the last. Even when sending permission-based emails, you can still find your messages locked out if your email infrastructure, authentication protocols, or content raise ISPs’ suspicions.
Use the following tools to detect issues with your emails that might trigger ISPs’ ire:
In 2021, we told you about SendForensics. To use this comprehensive deliverability and compliance tool, you’ll send your proposed emails to a testing address assigned to your brand. SendForensic will review what happened along the way and score your email’s deliverability. Enterprise brands can also take advantage of SendForensics’ sender assurance and compliance services.
This year, I have another deliverability testing tool to add to your kit: GlockApps. Send your email to GlockApps and you’ll receive an email deliverability report that identifies deliverability issues and gives your content a spam score. GlockApps submits your emails to multiple spam filter tools, including Google Spam Filter, Barracuda, SpamAssassin, and Mimecast, before providing you with a final score and feedback for making improvements.
Tools to preview your emails across different devices and clients

Because email clients and devices don’t all render your emails the same way, your choice of codes, formats, designs, and other specifications can make a huge difference in how even a well-crafted email performs. Optimizing your emails to perform in the broadest set of situations will improve your subscribers’ experiences.
Mastercraftsman Daedalus and his son Icarus learned the importance of respecting situational limitations when Daedalus crafted magnificent wings for the two of them to use to escape a prison.
You see, these wings only worked correctly within a narrow set of parameters. If they flew too close to the sea while wearing them, the weight of the sea spray on the wings’ feathers would drag them down. If they rose too close to the sun, its heat would melt the wax that held the wings together.
When Icarus flew outside the ideal environment for his wings, they fell apart, and he plunged to his death.
Avoid a plunge in your email engagement metrics by checking your emails against different devices and email clients’ parameters using one of our 2021 recommendations, Email on Acid’s email previewer. This email testing multi-tool also allows you to check for broken code or broken links before hitting send.
Email Preview Service is another email previewer that lets you check your messages’ output on various devices. It enables you to check emails via copy and pasting your content into the app, sending it via API, uploading your HTML, or sending the email to a particular test account.
All in one checker, HTML Email Check validates your HTML code and identifies any problems. This tool also checks your CSS markup, fonts, images, links, and mobile, and accessibility attributes. This application allows you to check your code for suitability across all the major email clients, plus some not-so-major ones.
Avoid having your emails clipped or downloading too slow for mobile by testing your file sizes, too. If you find that your emails are getting a little too big for the inbox, use an HTML compressor or HTML minifier to shrink them down to size.
Tools to prevent broken links from sending your subscribers the wrong signal
Is there anything worse than having to send a “Sorry for the error, here’s an email with the correct links” message? Ugh! Avoid the embarrassment by checking your links before you send your emails using these link checking tools from our 2021 toolkit, Redirect Detective, and HTTPSStatus.
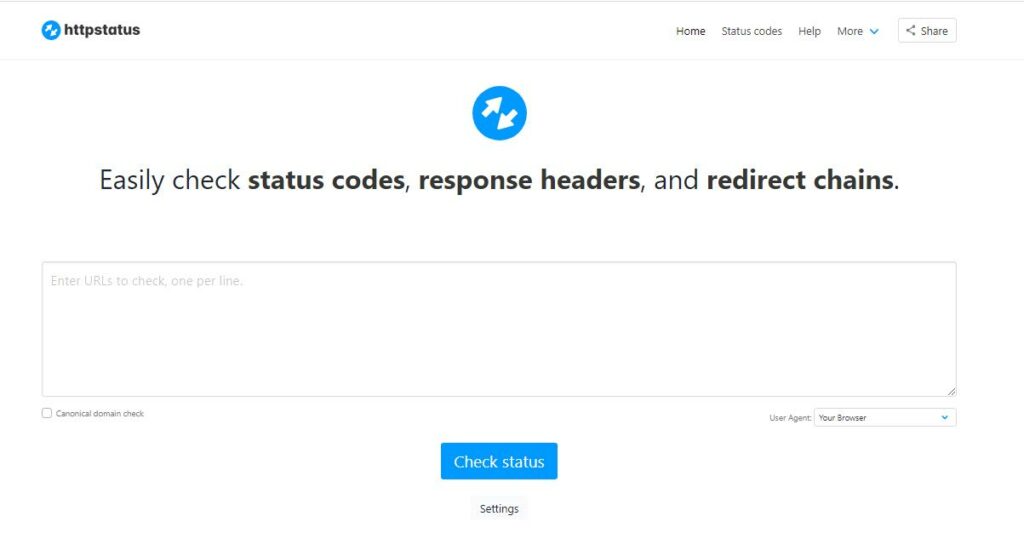
Email review tools to check your messages’ accessibility
Images and videos add interest to your emails, but they aren’t always accessible for your subscribers. Expand your reach by choosing colors and fonts that accommodate readers with color-blindness or other visual limitations, and make sure your content is screen-reader friendly.
Use these tools to see how well you score on the accessibility scale.
If there’s too little contrast between your background and your text, your message may be hidden. To test the viewability of your email’s color combinations and font selections, try WhoCanUse or WebAIM’s Contrast Checker.
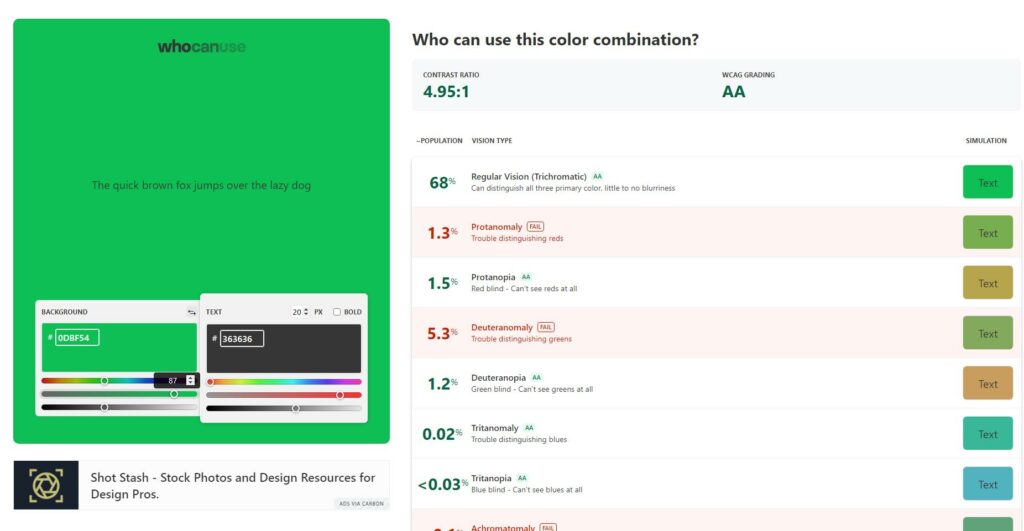
WhoCanUse’s hand comparison chart (on the right side of this image) demonstrates how people with different vision types will perceive your message.
Find out how your emails sound by downloading a copy of NV Access and listening for yourself.
Suppose you need some practical tips to improve your email’s accessibility; enter the HTML code at Accessible-Email.org. You can also use this tool to analyze your previous campaigns.
Data-driven tools to assess your email campaign’s chances of success
Human beings put a lot of faith in the power of instinct to steer them in the right direction. But sometimes instincts can be wrong, and relying on them can be costly. If you’re still using gut checks instead of data-backed tests to assess your email campaign strategies and content, you could be missing out on valuable opens, click-throughs, and conversions.
So, along with checking the deliverability and appearance of your emails, do some tests to confirm that your emails will accomplish what you intended.
Start with a review of your email’s subject line
Compelling subject lines are critical to any email campaign’s success. If your subject line doesn’t make your subscribers want to click, the rest of your message is lost.
The two subject line testers in our 2021 toolkit, the Advanced Marketing Institute’s Emotional Marketing Value (EMV) Headline Analyzer and CoSchedule’s Email Subject Line Tester look at the length and word selections in your subject line to determine if you’ve made an appealing argument for the open.
If you’d like to get a third opinion, try SubjectLine.com. This free tool boasts a record of over 15 million subject lines tested and now offers ChatGPT integration.
Remove all of the following: If you’d like to get a third opinion, try Send Check It. This email subject line tester compares your subject line 100,000+ others to assess its potential.
Curious to see how much of your subject line subscribers will see on their mobile devices? Try TestSubject.
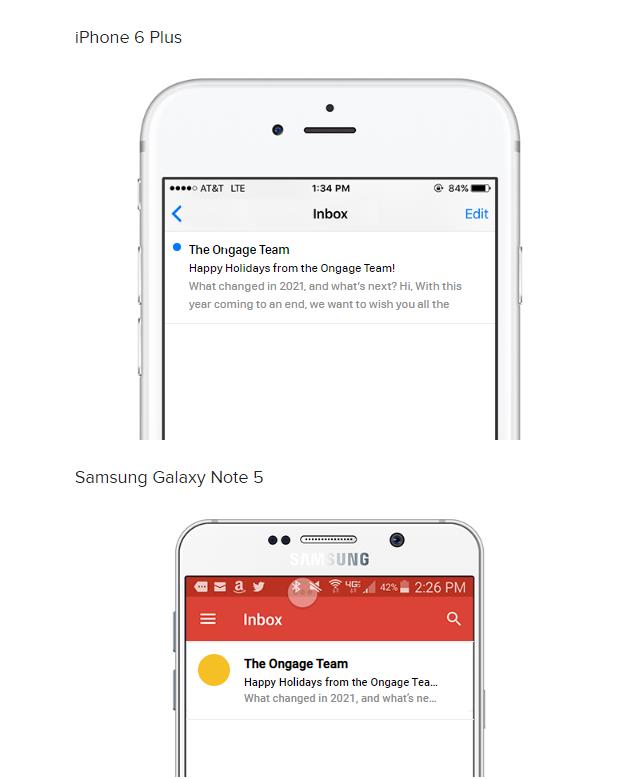
Take your email quality to the next level by facing off against your most significant competitor in A/B testing
This next set of tools takes things to a new level–testing your email content, sending times, segments, or other factors against your biggest competitor: you.
After you’ve developed what you believe is a perfect message and sending strategy, put it through the rigors of A/B (split) or multivariate testing to see if your beliefs are correct.
Is your new segmentation strategy better than the previous one? Which From Name earns the most engagement from your subscribers? Does your call to action (CTA) get subscribers to act?
Split or multivariate testing tools allow you to send different email variations to separate portions of your target audience to see which one achieves the best results.
With this data in hand, you can then distribute the winner to the rest of your segment. Melissa wrote all about it in her 2021 article, What Is A/B Testing? and How To Identify Winners in Email Marketing.
Ongage users can use our built-in A/B/n testing feature to conduct tests and quickly automate the distribution of the winner. But other tools can dig even deeper.
For our 2022 list of top A/B testing tools, we’re bringing back two of our favorites from 2021’s toolkit.
Dynamic Yield is an A/B testing and optimization application for enterprise brands. The tool supports testing across channels and anywhere in your tech stack by bringing client-side and server-side testing together on a single platform.
Touted as the world’s fastest A/B testing platform, Optimizely’s capabilities extend beyond its marquee Web Experimentation tool. Using the A/B test feature inside Optimizely Smart Campaigns, you can create and test emails, print materials, text or push messages.
Manage and monitor your reputation to avoid deliverability issues
A poor sender reputation can put a fast end to the best email campaigns. If ISPs don’t believe you are a credible sender, they won’t let you reach their subscribers’ inboxes.
Maintaining a good sender reputation begins with the basics–establishing your identity. Set up your authentication protocols to prevent spammers from using your sending address as a Trojan Horse and prove ISPs you’re a legit sender.
Keep an eye on internal and external deliverability metrics
Use your Ongage analytics suite to monitor your sender reputation. Ongage’s snapshot and customized reports can alert you to deliverability issues such as an increase in bounce rates or signs that an email client is throttling your sending volume. Our new built-in reporting tool will even include the specific bounce reason.
Then, look at external sources. Get a review of your reputation straight from the ones doing the judging by registering with Google Postmaster Tools, Verizon Media’s (Yahoo/AOL) Postmaster Tools, and Microsoft’s Smart Network Data Service.
Each ISP chooses the information it provides to email senders, and some postmaster tools will give you more details than others.
For example, Verizon Media’s Yahoo offers inbox placement and engagement metrics, such as open rates and read times. In contrast, Google’s Gmail keeps much of this information secret, sharing only a summary of your sender reputation, authentication status, and spam complaint rate via its Postmaster Tools.
ISPs will also provide information about your spam complaints if you register for their feedback loops (a.k.a. complaint feedback loops). Again, the amount of data you’ll receive varies. Some IPSs identify the email address of the complaining subscriber (put these on your suppression list). Other email clients only provide an aggregate report of complaints. Learn more about this topic by diving into our postmaster blog.
Outside of ISPs, you can visit SenderScore.org to assess your sender reputation. You can also get a non-ISP opinion about your IP or domain reputation from Cisco’s Talos Reputation Center.
Could your website’s content cause problems for your email program? Find out if your website or any affiliate or partner sites are publishing content that could damage your reputation by doing a Google Safe Browsing site status check for each URL linked to your domain.
Make sure your domain isn’t on any naughty lists
Are you experiencing a sudden and sharp drop in deliverability? You might be on a blocklist. Remote blocklists (RLBs) are independently maintained lists of IP addresses linked to spam or other malicious behavior. Your IP or domain may end up on one of these lists if you’ve been caught in a spam trap.
You are more likely to end up on a blocklist if you use purchased email lists, send messages to consumers who have opted out or unsubscribed from your lists, or sent emails containing fraudulent offers, spyware, or other malicious content. (Yeah, you shouldn’t do that stuff. Ever.)
The following tools will tell you if you’re blocklisted:
- The Anti-Abuse Project’s Multi-RBL Check.
- MX Toolbox’s Blacklist Check.
- The complete IP check for sending Mailservers hosted by Multirbl.valli.org.
- Barracuda Central’s Barracuda Reputation IP/Domain Lookup.
Call on other channel tools for a coordinated approach to growth and conversions
Today’s consumers expect your communications with them to be consistent, regardless of channel. They also expect you to find them if you want to get in touch. Make sure your messaging is on-brand and appears at the right place and time by coordinating your email marketing, website, and mobile text marketing.
Integrate SMS messaging into your digital marketing strategy with the help of one of following Ongage’s SMS marketing partners:
📲CM
These providers offer a slightly different mix of SMS, rich SMS, multimedia messaging service (MMS), and rich communication service (RCS) support. They all make it easy for you to integrate SMS into your marketing campaigns with API integrations.
Beyond SMS, a great way to keep the conversation going after your email recipient clicks through to your website is to direct them to a unique campaign landing page.
You worked so hard on creating a personalized email via different customizations. Extend this personal touch by building high-converting landing pages to receive your subscribers’ after a click-through.
If you need help, try our friends at Elementor. This WordPress website builder has everything you need to coordinate your campaign messaging from click to conversion.
Here’s a sample landing page from Elementor that incorporates a dynamic countdown timer.

Sending your subscribers to customized landing pages shortens their journey from email to sale and provides you with valuable data about who’s visiting your site and why.
Widen your perspective with data consolidation and analytics tools
There’s no doubt that information is an essential tool for every email marketer’s toolbox and Ongage helps you keep track of a lot of that information. But your organization has a lot of information outside the realm of email marketing that could be useful to you. Pull together and parse data from multiple sources across your organization with these visualization and analytics tools.
Databox gives your marketing team a panoramic view of their performance by integrating data from all of your favorite tools in one place.

Create interactive dashboards and intuitive reports using Google’s Data Studio. This tool brings together your Google Analytics, BigQuery, and Ads data along with information from spreadsheets and other sources to show your team how their marketing strategy is performing.
Data aggregation and analytics tool Supermetrics tells visitors to its website, “We get data.” Collect your email engagement metrics, eCommerce sales, inventory data, or any other information you need to make strategic marketing decisions using this tool.
Keep track of your content and your team with these management tools
With all the tasks and assets the average email marketing team has to juggle, managing these elements requires special tools. Whether you prefer to keep your content and team management separate or use a hybrid system that puts everything together for you, there’s an app for that.
Here are some of our favorites.
Content marketing platforms to keep up-to-date and under control
High-performance email marketing teams may work on as many as 31 email campaigns at once. It doesn’t take long for even a small marketing team to accumulate hundreds of images, templates, and other content assets. Ensuring that you can find the assets you need when you need them (and have found the most recent iteration) can become a huge time drain if you don’t have a content management system (CMS).
Among our favorites, last year and now, are Paperflite and Contentful.
Paperflite’s marketing and sales collateral management platform empowers your team to develop, store and share customized asset sets to support your sales and marketing efforts. In addition, Paperflite can be integrated with your CRM or ESP and enables you to track engagement.
Easy to launch and integrate with your other tools, Contentful’s API-first, headless CMS provides high-powered storage and distribution capabilities for your digital content. Contentful is designed to serve as your single source of truth, not just for marketing assets but for all your documentation. It’s a great enterprise-ready content management solution.
Supplement these CMS selections with user-generated content (UGC) platform and digital asset manager (DAM), Stackla. Use Stackla to locate images and videos created by your customers, manage usage rights and keep track of your other digital assets too.

Manage your email marketing team’s progress with project and team management apps or build-it-your-way tools

Even with all these tools at your fingertips, email marketing isn’t a solo pursuit. You’ll need the help of a team. Use these tools to facilitate team collaboration, keep the lines of communication open, and deliver your campaigns on time.
ClickUp keeps your projects under one roof with features that allow your team to embed docs and tasks from Airtable and Google Sheets and monitor Slack, Outlook, and other communication channels.
If you want more flexibility to build custom processes, Airtable or Notion might be the right tool for you and your team. These tools let you build databases, create workflows, and handle team communications. You can develop your team’s system from scratch or use one of the many templates–some of them shared by other users.
Even before remote work became commonplace, tools to improve team communication and productivity proliferated. Asana, Monday, GetBusy, and Wrike are among your choices.
Which tool is right for your team? The marketing team here at Ongage uses ClickUp. We like its versatility and the fact that it’s dead simple. But the right tool for you is the one your team will use. So be sure to do some testing and get your team’s feedback before making a choice. Then pick a project management app that removes friction from your workflows and improves everyone’s productivity.
The right email marketing tools and a great team support every email marketing hero’s success. Make Ongage a part of your team in 2022.
Want to discover how our email marketing platform plus these incredible tools can help you meet your goals in 2022. Schedule your Ongage demo here.
This was our pick of email marketing tools to check out this year. See you again next year and godspeed.


